
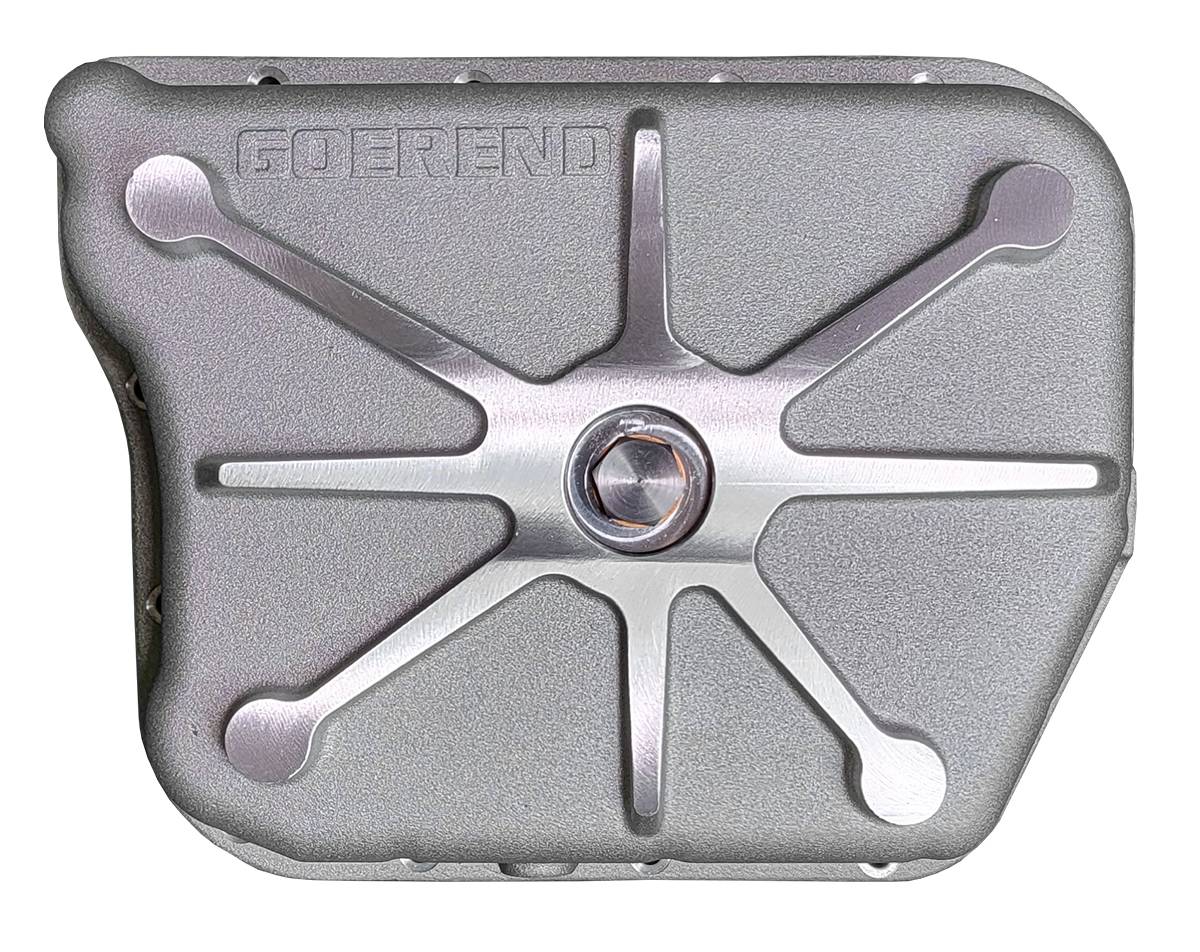
Transmission Pan Kit
Chrysler 47RH - 48RE
D-PAN-4748-LOGO
Pricing:
$299.00
Description
Goerend Difference:
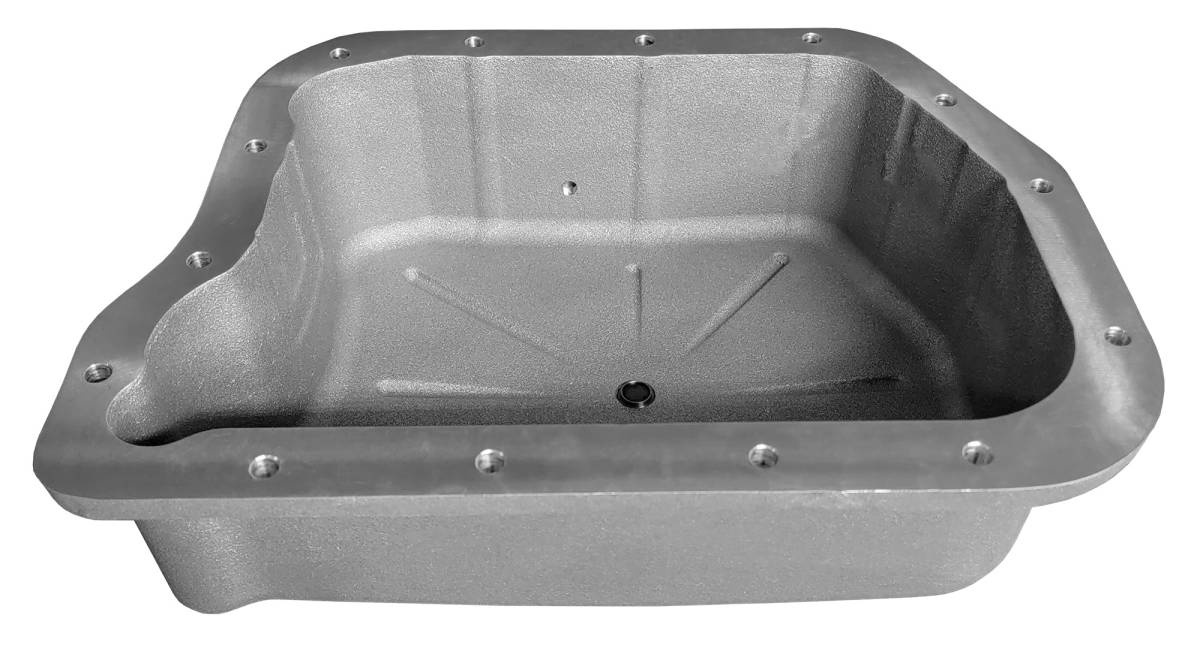
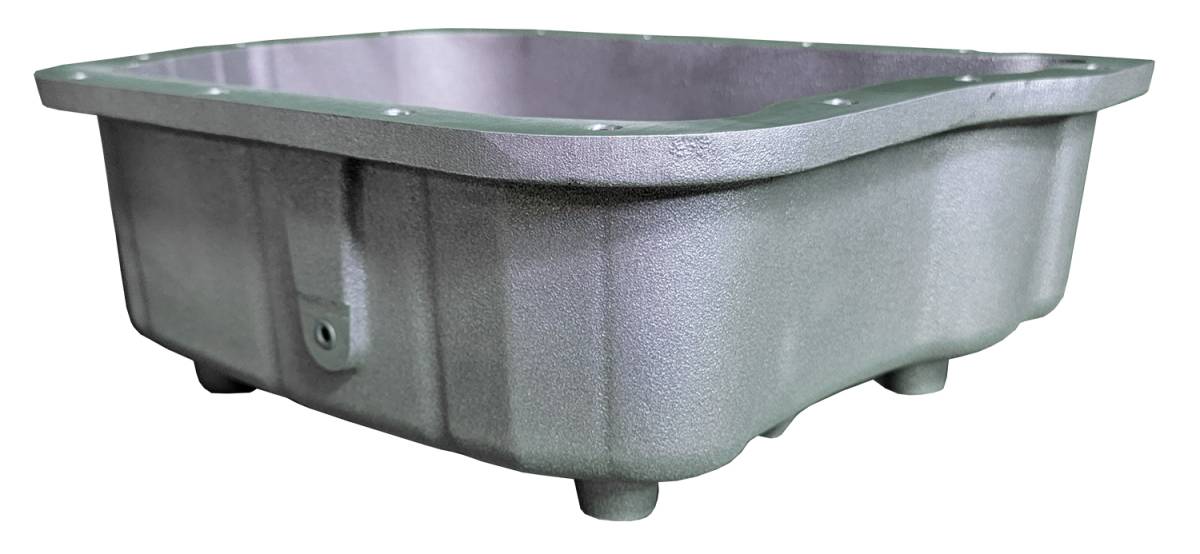
- Constructed of lightweight cast-aluminum
- Efficient heat dissipation and durability
- Holds approximately 2.5 quarts more fluid than the OE version
- Patented sloped floor design
- Results in 100% fluid drainage
- Maintains flat bottom for easy installation
- Magnetic drain plug
- Eliminates debris from circulating throughout transmission
- Uses a 1" socket for easy removal
- Designed not to strip
- Copper sealing ring
- Provides a leak-free seal
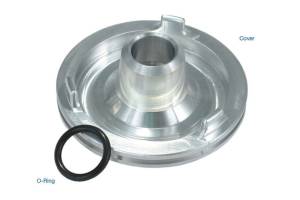
- Billet steel lowering block
- Positions filter in optimum position
What's in the box?
- (1) lightweight cast-aluminum transmission pan
- (1) duraprene pan gasket
- (1) temperature sender port plug
- (1) 3/16" Allen wrench
- (1) 1/4" Allen head driver socket
- (1) lowering block
- (1) lowering block O-ring (pre-installed)
- (1) filter
- (1) magnetic drain plug (pre-installed)
- (1) copper sealing ring (pre-installed)
- (2) lowering block filter screws (pre-installed)
- (15) bolts
- (15) washers
Machining Process:
Goerend pans are machined using three operations performed by in-house Mazak CNC machines.
- Operation #1 includes drilling bolt holes on bottom side of pan
- Operation #2 includes machining surface of pan to create leak-proof seal against pan gasket
- Operation #3 includes drilling and tapping hole for temp sender and drain plug
Torque Specifications:
- Lowering block screws: 35 in-lb.
- Filter screws: 35 in-lb.
- Drain plug: 240 in-lb.
- Pan bolts: 120 in-lb.
Articles:
Videos
FAQ
What transmission filter should I use?
For best results, use Mopar transmission filters. We prefer to use the early style open element filter because it will seal up better. The exception to this would be the deep factory stamped pan. This pan should take the late style plastic filter because it will sit deeper in the fluid within the pan.
What is the size of the temperature sender port?
Temperature sender port size is 1/8"-27 NPT.
Should I use an RTV silicone sealant with my transmission pan?
Silicone sealant shouldn’t be necessary, but using it won’t cause any issues. We don’t have a specific brand recommendation.
Shipping Information
- Item Requires Shipping
- 17.0 lbs.
- W12.0000” x H6.0000” x L16.0000”